With the increasing demand for renewable energy and a growing awareness of environmental issues, solar panels have become an attractive option for homeowners, businesses, and even entire communities. Installing solar panels is not only a great way to reduce your carbon footprint but also an investment that can help lower energy bills in the long run. However, the process can seem complex if you’re new to solar energy. In this read, we’ll go through the entire solar panel installation process, from assessing your energy needs to enjoying the benefits of clean, renewable energy.
Step 1: Determine Your Energy Needs
Before jumping into the installation process, it’s essential to understand how much energy you use and how much energy you want to generate. Assessing your energy needs will help you determine the size of the solar panel system you need.
Start by reviewing your electricity bills for the last 12 months to get an idea of your average monthly energy consumption. This will be measured in kilowatt-hours (kWh). Solar panels generate energy in direct proportion to the sunlight they receive, so it’s important to match your system size with your consumption needs.
If you’re looking to be completely off-grid, you will need to install enough panels to cover all of your energy needs. However, if you’re interested in reducing your energy bill, you might only need to cover a portion of your consumption.
Step 2: Evaluate Your Roof’s Suitability
The next step in the solar installation process is assessing your roof’s suitability. Solar panels need to be installed in a location that receives plenty of sunlight throughout the day. Typically, the roof is the most practical installation site, but not all roofs are ideal.
Consider these factors when evaluating your roof:
• Orientation: South-facing roofs tend to receive the most sunlight, especially in the Northern Hemisphere. East or west-facing roofs can also be viable, but the system may be less efficient.
• Tilt and Angle: The angle at which the panels are installed can significantly affect their energy production. The optimal tilt depends on your geographical location and the time of year.
• Roof Condition: Your roof should be in good condition, as solar panels can last 25 years or more. If your roof is due for repair or replacement soon, it’s better to address by hiring an experienced roofer this before installing solar panels.
• Obstructions: Trees, chimneys, or nearby buildings can cast shadows on your panels, reducing their efficiency. Be sure there is no shading during peak sunlight hours (typically 9 AM to 3 PM).
Step 3: Choose the Right Solar Panel System
Once you’ve assessed your energy needs and roof suitability, it’s time to choose the right solar panel system for your home. There are three main types of solar panels available:
• Monocrystalline: These panels are made from a single continuous crystal structure, offering the highest efficiency and longevity. They are typically the most expensive option but provide better performance in limited space.
• Polycrystalline: Made from silicon crystals that are melted and poured into molds, polycrystalline panels are less efficient than monocrystalline but are more affordable.
• Thin-Film: These panels are made by layering photovoltaic material onto a substrate, such as glass or metal. They are less efficient but can be a good option for larger spaces or unique installations.
Step 4: Obtain Permits and Approvals
Before starting the installation process, check with your local authorities for any permits or approvals required. Some cities or municipalities may have building codes, zoning laws, or other regulations governing solar panel installations. Failing to obtain the proper permits can result in fines or the need to uninstall the system later.
Typical permits you may need include:
• Building Permit: For structural modifications to your roof.
• Electrical Permit: For connecting the solar system to the grid.
• Grid Connection Approval: If you plan to stay connected to the utility grid, you may need approval from your local energy provider.
You may also want to check if there are any incentives, tax rebates, or grants available in your region. Many governments offer financial incentives for installing solar panels to encourage renewable energy adoption.
Step 5: Hire a Professional Installer (or DIY)
While installing solar panels is a rewarding and eco-friendly project, it requires technical expertise and the right equipment. Unless you’re an experienced installer, it’s usually best to hire a licensed solar panel installation professional such as mmksolar.ie to handle the installation. They will ensure everything is up to code and safely installed.
However, if you’re a seasoned DIYer and want to tackle the project yourself, there are a few things to keep in mind:
• Safety: Working with electricity and climbing onto a roof can be dangerous. Always prioritize safety, and if you’re unsure about anything, consult a professional.
• Tools: You will need specialized tools like a drill, mounting hardware, electrical connectors, and a voltage tester.
• Time and Labor: Installing solar panels can take several days, especially if you’re working alone. Factor in the time and effort needed for a successful installation.
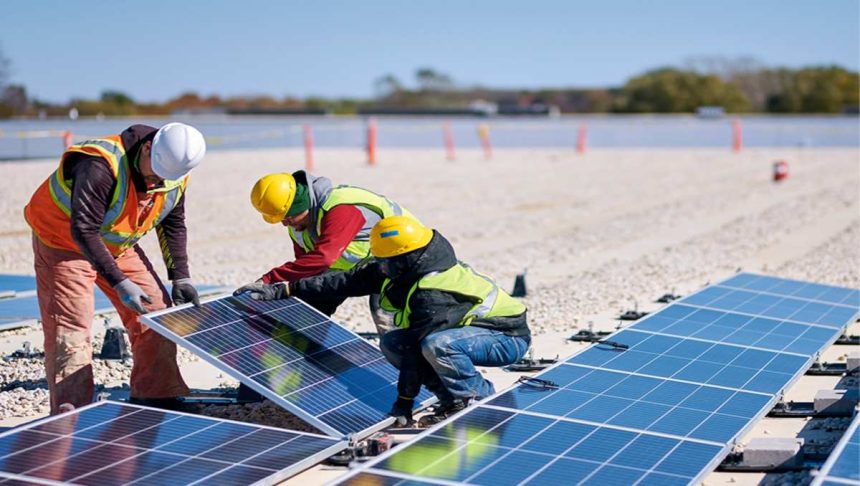
Step 6: Install the Solar Panels
If you’ve hired a professional, they will handle all the steps of the installation. For those who want to install the panels themselves, the general steps are as follows:
1. Mount the Rails: Install the mounting rails onto the roof using brackets and ensure they are level and secure.
2. Install the Solar Panels: Attach the panels to the rails and tighten the bolts. Be sure the panels are positioned to optimize sunlight exposure.
3. Wire the Panels: Connect the panels to each other in series or parallel, depending on the configuration you’ve chosen. Wire the panels to the inverter, ensuring all electrical connections are tight and secure.
4. Inverter Installation: Install the inverter near your electrical panel, preferably in a shaded area to avoid overheating.
5. Connect to the Grid (Optional): If you plan to remain grid-tied, connect your system to the utility grid according to local regulations.
Step 7: Test the System and Monitor Performance
After the panels are installed and wired, the system needs to be tested. This will typically involve an inspection by a licensed electrician or a representative from your local utility provider to ensure the system is functioning correctly and safely.
Once approved, your solar panels should begin generating electricity. Many solar systems come with monitoring software that allows you to track your energy production and consumption in real-time.
Final Word
Installing solar panels is a rewarding project that can provide you with clean, renewable energy for decades. While the process may seem daunting at first, breaking it down into manageable steps makes it easier to understand. From assessing your energy needs to choosing the right system, obtaining permits, and hiring professionals, each step is crucial for a successful solar panel installation. Keep in mind that solar panels not only reduce your environmental impact but can also lead to long-term savings. With the right planning and execution, you can enjoy the many benefits of solar energy.
Lynn Martelli is an editor at Readability. She received her MFA in Creative Writing from Antioch University and has worked as an editor for over 10 years. Lynn has edited a wide variety of books, including fiction, non-fiction, memoirs, and more. In her free time, Lynn enjoys reading, writing, and spending time with her family and friends.